When you connect the Malahit DSP2 to a Windows 10 computer, you can control it and see a waterfall on it. There are many tools on Windows 10, which are supporting the sound input from the Malahit DSP2.
Tools with sound input and CAT control (Windows 10):
- SDRUno
- HDSDR
- SDR#
Features which are possible:
- Waterfall
- Sync frequency and some settings from the Malahit DSP2 to the PC
- Sync frequency and some settings from the PC to the Malahit DSP2
In this blog post, i show you SDRUno with OmniRig.
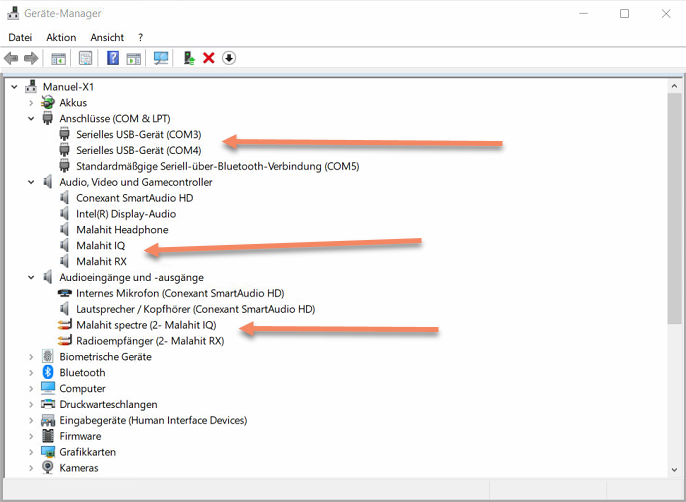
Malahit DSP2 – Driver
For me it wasn´t necessary to install any driver. Windows 10 found the driver by itself. In the Device Manager it should look like this:
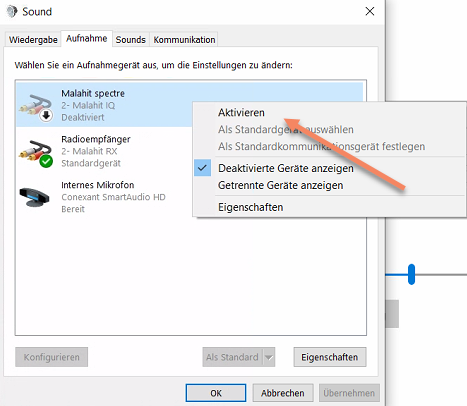
Malahit DSP2 – Sound control pannel
Open the Windows 10 sound control panel and then the record tab and activate Malahit spectre – Malahit IQ:
Malahit DSP2 – OmniRig 1.19
At first you must install OmniRig 1.19. With the 2.1 version i had problems. The installation is easy, so i don´t make screenshots from it.
- Download OniRig 1.19: http://www.dxatlas.com/OmniRig/Files/OmniRig.zip
Now you can start OmniRig and configure it like this:
- Tab: RIG1 (or if you have other receivers connected, pelase note the rig number for SDRUno setup later)
- Rig type: 480-TS
- One of the com ports in your device manager (for me it was the second one COM4)
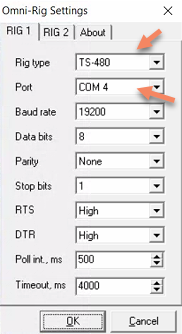
If you make change in OmniRig, SDRUno must be shutdown. If not, it don´t get the new configuration.
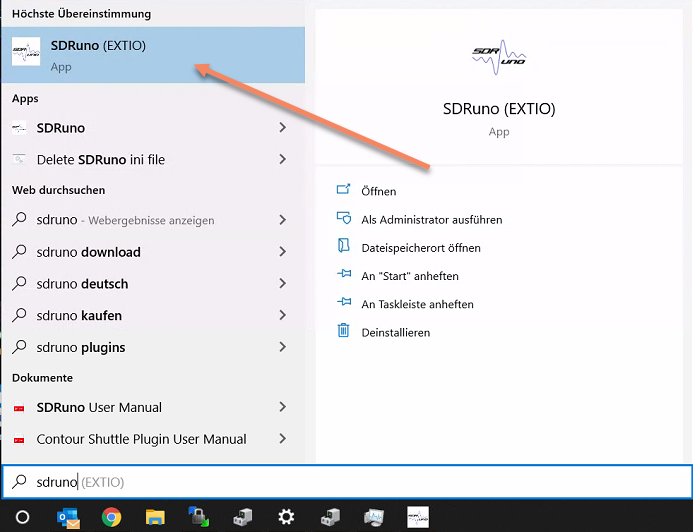
Malahit DSP2 – SDRUno
The Installtion is very easy. You can find it here:
- Download: https://www.sdrplay.com/sdruno/
Now please start the SDRUno (EXTIO) version, because only in this version, you can change to a audio source:
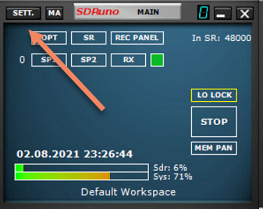
Now click on the SETT. button:
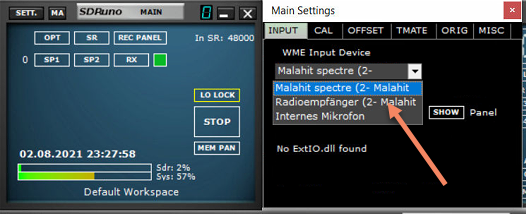
Now change to the input device of the Malahit DSP2. If you don´t know which of them is the correct, test both:
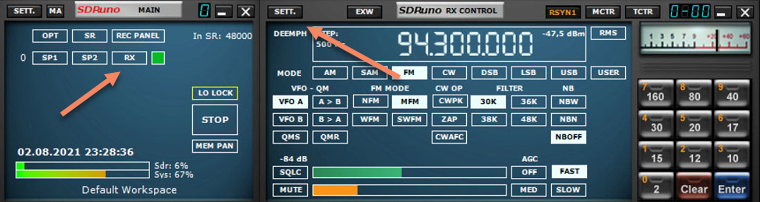
Click on the RX button on the left side and than on the SETT. button, from the new window:
On the new settings windows click on the tav ORIG and than click on RIG1 and activate all checkboxes:

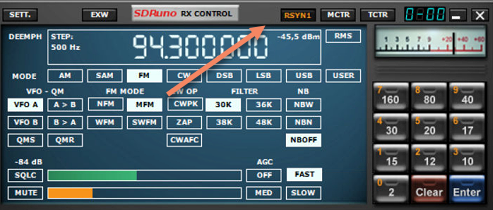
At last click on the RSYN1 button:
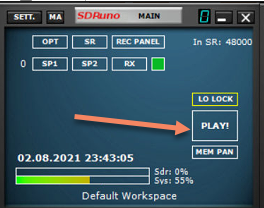
Now you can start the receiving with a click on the PLAY! button:
At the end it should look like this. You can add the two waterfall windows with SP1 / SP2 buttons:

If you now change the frequency or the mode in SDRUno, the Malahit DSP2 should get this change.
Please note: It can take some moment for the synchronisation.