MLA 30 Plus – BNC socket
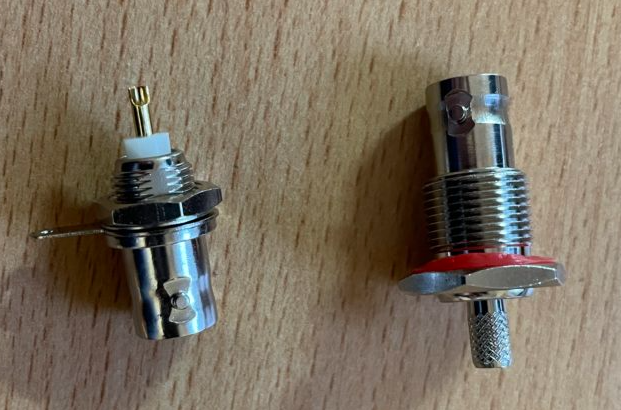
Since the cable on the MLA 30 Plus is fixed, quite thin and 5m long, I decided to install a BNC socket. I had these two BNC sockets in stock. I would have liked the larger with the rubber verbau, but the diameter seemed too thick, so I have the left variant use.
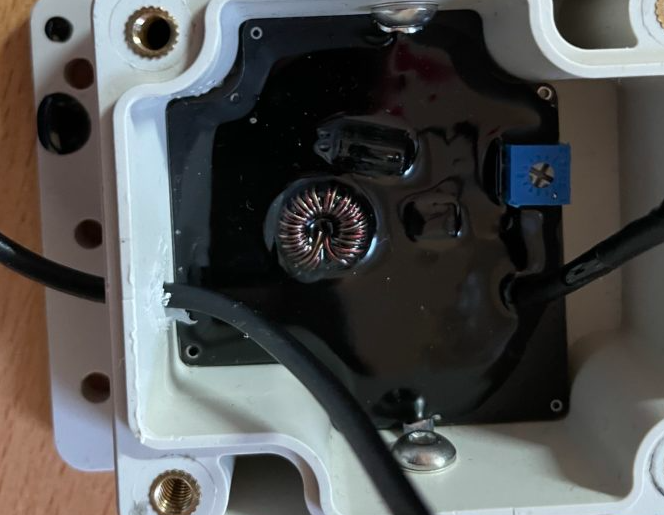
- When you open the lid, you will see the cable, which is attached to the housing with hot glue.

- The cable can be pulled 20 cm inwards with a little force and then the cable can be clipped off and the adhesive carefully removed.
- Now the hole can be drilled out. I did this with a hand drill, because otherwise you can hit the coil in the middle very quickly. I have seen some videos where the coil was striped with the drill.
- In my case, the diameter of the smaller BNC socket was 9 mm.
- Then the rubber must be removed a few cm. After that I bent the screen backwards.


- Twist the shield together and tin it.
- Tin inner conductor.
- Install the BNC socket. Depending on how much black epoxy was poured, it may be very tight with the nut. It may be necessary to scrape or file the black epoxy down to the board.
- Solder the sheath and inner conductor to the socket. I left the cable longer on purpose in case I want to make adjustments in the future.
- If you still have a ferrite core / folding ferrite, you can still attach it to the coax cable in the housing.

- It might make sense to adjust the blue potentiometer in the upper left corner. With the included wire loop, you can definitely raise the sensitivity a bit. In my case, I had to turn it counterclockwise.
- If you use a longer or thicker loop, you should reduce the sensitivity, otherwise too much interference will be amplified.